Netify Agent v4 on OpenWrt
OpenWrt is a leading open-source operating system for embedded devices and network gateways, powering a wide range of routers and edge devices worldwide. Its flexibility and robust package management make it a popular choice for commercial OEMs, including brands like GL.iNet and reference platforms from the prpl Foundation.
This guide covers the installation of Netify Agent v4 for OpenWrt on x86 architecture. If you require support for ARM, MIPS, or other hardware platforms, please contact us – we have additional builds available for many targets.
Requirements
The OpenWrt router will need at least 2 network interfaces:
- Network Interface #1: used to access the operating system and Netify
- Network Interface #2: used to ingest port mirror traffic from LAN segment 1
- Network Interface #N: used to ingest port mirror traffic from LAN segment N (optional)
Depending on the amount and type of network traffic, a minimum of 256 MB RAM is required.
OpenWrt 23.05
Installation via Luci
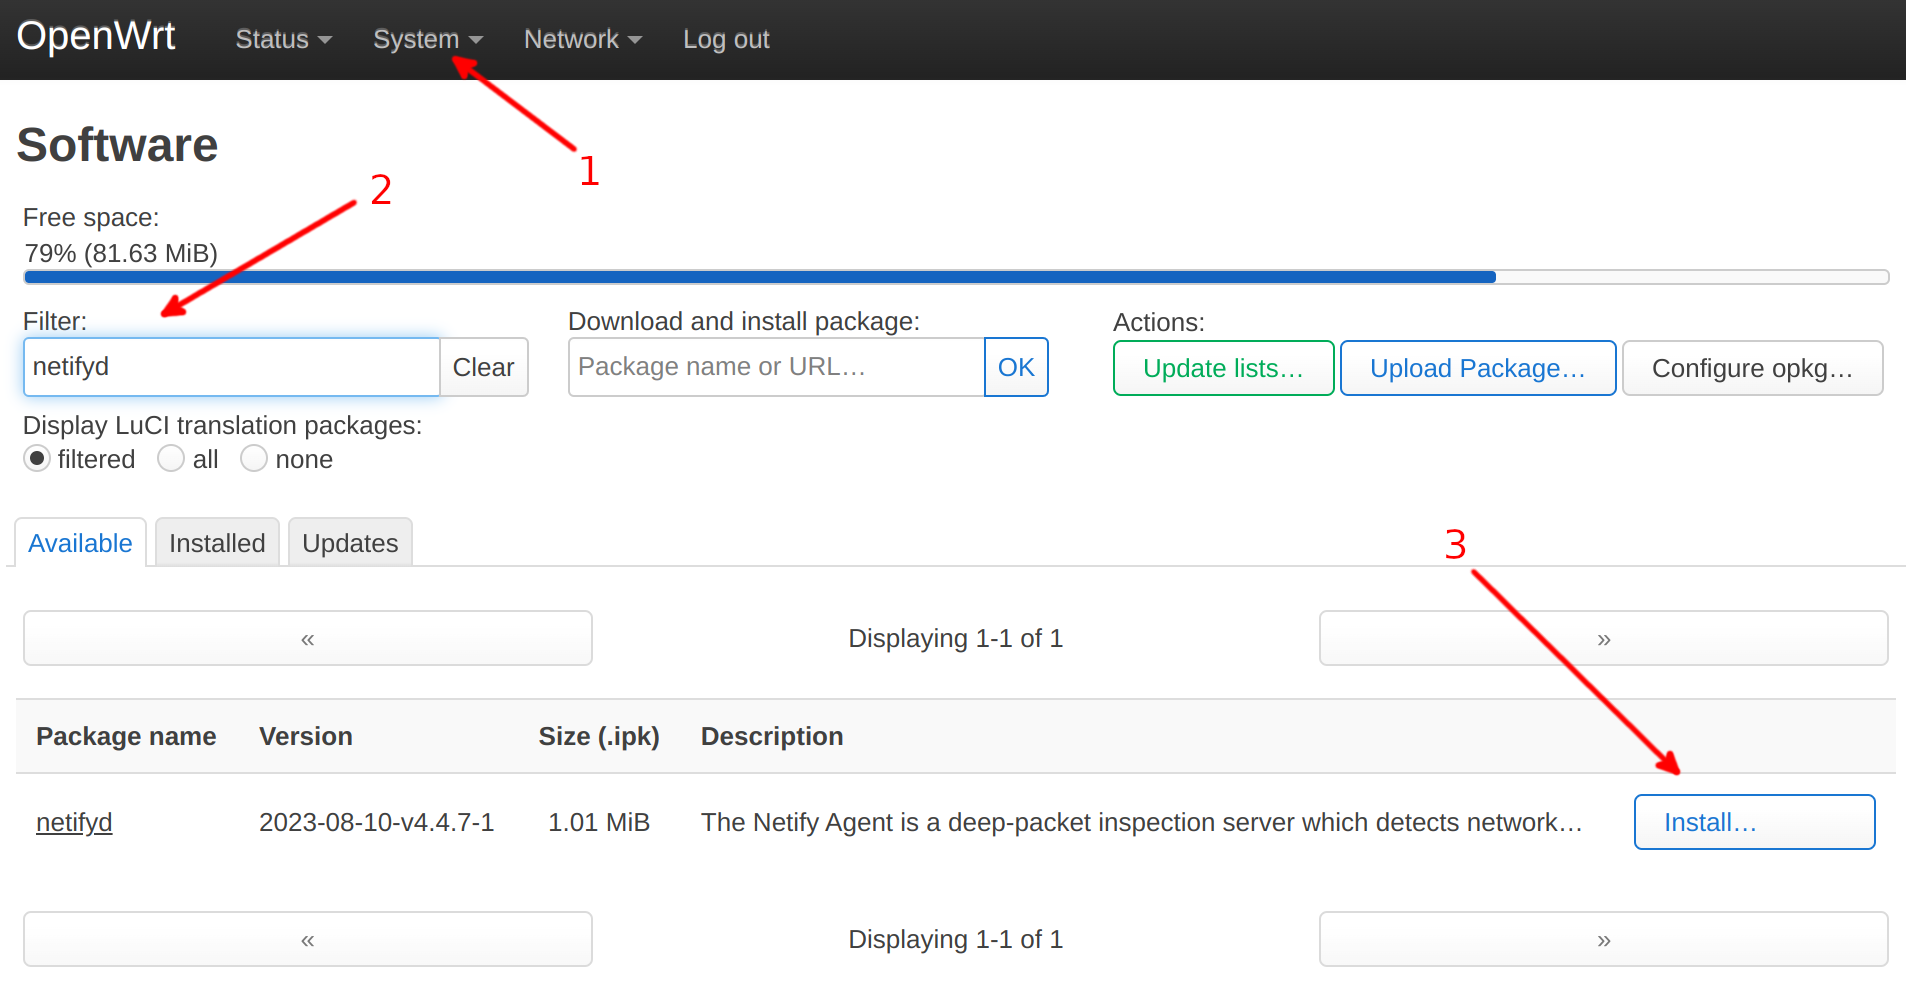
- Step 1
- Using LuCI, navigate to System → Software
- Step 2
- In the "Filter" input, search for netifyd
- Step 3
- Click the Install button next to the Netify package
Installation via Command Line
opkg update
opkg install netifyd
Post Installation
After installing the agent, verify the installation and some path information using the -s (status) argument.
$ netifyd -s
Netify Agent/4.4.7 (openwrt; x86_64; conntrack; netlink; plugins; regex)
✓ agent is running.
• persistent state path: /etc/netify.d
• volatile state path: /var/run/netifyd
• agent timestamp: Tue Mar 12 17:19:36 2024
• agent uptime: 0d 03:14:00
✓ active flows: 8
• CPU cores: 1
✓ CPU utilization (user + system): 0.1%
✓ CPU time (user / system): 0.0s / 0.0s
• maximum memory usage: 15124 kB
! br-lan [LAN]: initializing: packets (dropped / total): 0 / 0
✓ eth0 [WAN]: online: packets (dropped / total): 0 / 45
✓ DNS hint cache: enabled
• DNS hint cache entries: 0
• sink URL: https://sink.netify.ai/provision/
✗ sink services are disabled.
  To enable sink services, run the following command:
  # netifyd --enable-sink
✗ sink uploads are disabled.
  To enable sink uploads, ensure your Agent has been provisioned.
✓ sink agent UUID: TT-FZ-26-34
! sink site UUID is not set.
  A new site UUID will be automatically set after this agent has been provisioned by the sink server.
The Netify agent is not configured to start post install. Language pertaining to the agent not running should be expected.
Informatics Provisioning
Netify Informatics is an optional, cloud-based, SaaS service. The solution provides web-based insights into what's happening on the network. To enable, tollow the installation instructions.