pfSense
Installation on pfSense
- Requirements
- Adding Repository for Netify vs Command Line
- pfSense Plus 24.x
- pfSense Plus 23.x
- pfSense CE 2.7.x
- Post Installation
- Netify Informatics
- Next Steps
Requirements
pfSense is an open-source, easy-to-use and feature-rich firewall and routing platform that is based on FreeBSD. It is designed to provide a robust and secure network infrastructure by offering a range of networking and security features. pfSense is often used as a firewall, router, and VPN (Virtual Private Network) gateway, making it suitable for both home and business environments.
At the time of writing, Netify is a command line installation. There have been no integrations with pfSense's web-based administration tool. Installing Netify on pfSense provides administrators with a 'single pane of glass' when used with Netify Informatics.
As a dedicated gateway distribution, it is no surprise that 2 or more network interfaces are required:
- LAN Interface: client devices connecting to the internal network. This is the ideal interfaces for Netify to be configured to listen on as it provides flow analysis at client device resolution (ex. Apple iPhone 14 did X).
- WAN Interface: used to connect upstream to the ISP. Admins may choose to monitor on this interface, however, it's not always that interesting as most of the data is duplicated with "North/South" bound traffic from the LAN.
You will also need to know which version of pfSense you are running in order to access the correct binaries. If you're not sure, use the cat /etc/version command:
cat /etc/version
2.7.2-RELEASEAdding the Netify Repository vs Command Line
Adding the Netify repository to your pfSense server has three main advantages:
- Automatically resolves and install dependencies
- Increases security through the use of signed packages
- Allows for auto or simplified updates in the future
pfSense Plus 24.x
Adding Netify Repository
mkdir -p /usr/local/etc/pkg/fingerprints/Netify/trusted
curl https://download.netify.ai/5/freebsd/fingerprint -o /usr/local/etc/pkg/fingerprints/Netify/trusted/fingerprint
cat << EOF >  /usr/local/etc/pkg/repos/Netify.conf
Netify: {
  fingerprints: "/usr/local/etc/pkg/fingerprints/Netify",
  url: "https://download.netify.ai/5/freebsd/15.0",
  signature_type: "fingerprints",
  mirror_type: "http",
  priority: 11,
  enabled: yes
}
EOF

pkg update
After executing this command, you should see:
Updating Netify repository catalogue...
Netify repository is up to date.
..
.
All repositories are up to date.
You can now install the agent with this command:
pkg install netifydCommand Line Installation
pkg add http://download.netify.ai/5/freebsd/15.0/amd64/netifyd-5.0.44-1.pkgpfSense Plus 23.x
Adding Netify Repository
mkdir -p /usr/local/etc/pkg/fingerprints/Netify/trusted
curl https://download.netify.ai/5/freebsd/fingerprint -o /usr/local/etc/pkg/fingerprints/Netify/trusted/fingerprint
cat << EOF >  /usr/local/etc/pkg/repos/Netify.conf
Netify: {
  fingerprints: "/usr/local/etc/pkg/fingerprints/Netify",
  url: "https://download.netify.ai/5/freebsd/14.0",
  signature_type: "fingerprints",
  mirror_type: "http",
  priority: 11,
  enabled: yes
}
EOF

pkg update
After executing this command, you should see:
Updating Netify repository catalogue...
Netify repository is up to date.
..
.
All repositories are up to date.
You can now install the agent with this command:
pkg install netifydCommand Line Installation
pkg add http://download.netify.ai/5/freebsd/14.0/amd64/netifyd-5.0.44-1.pkgpfSense CE 2.7.x
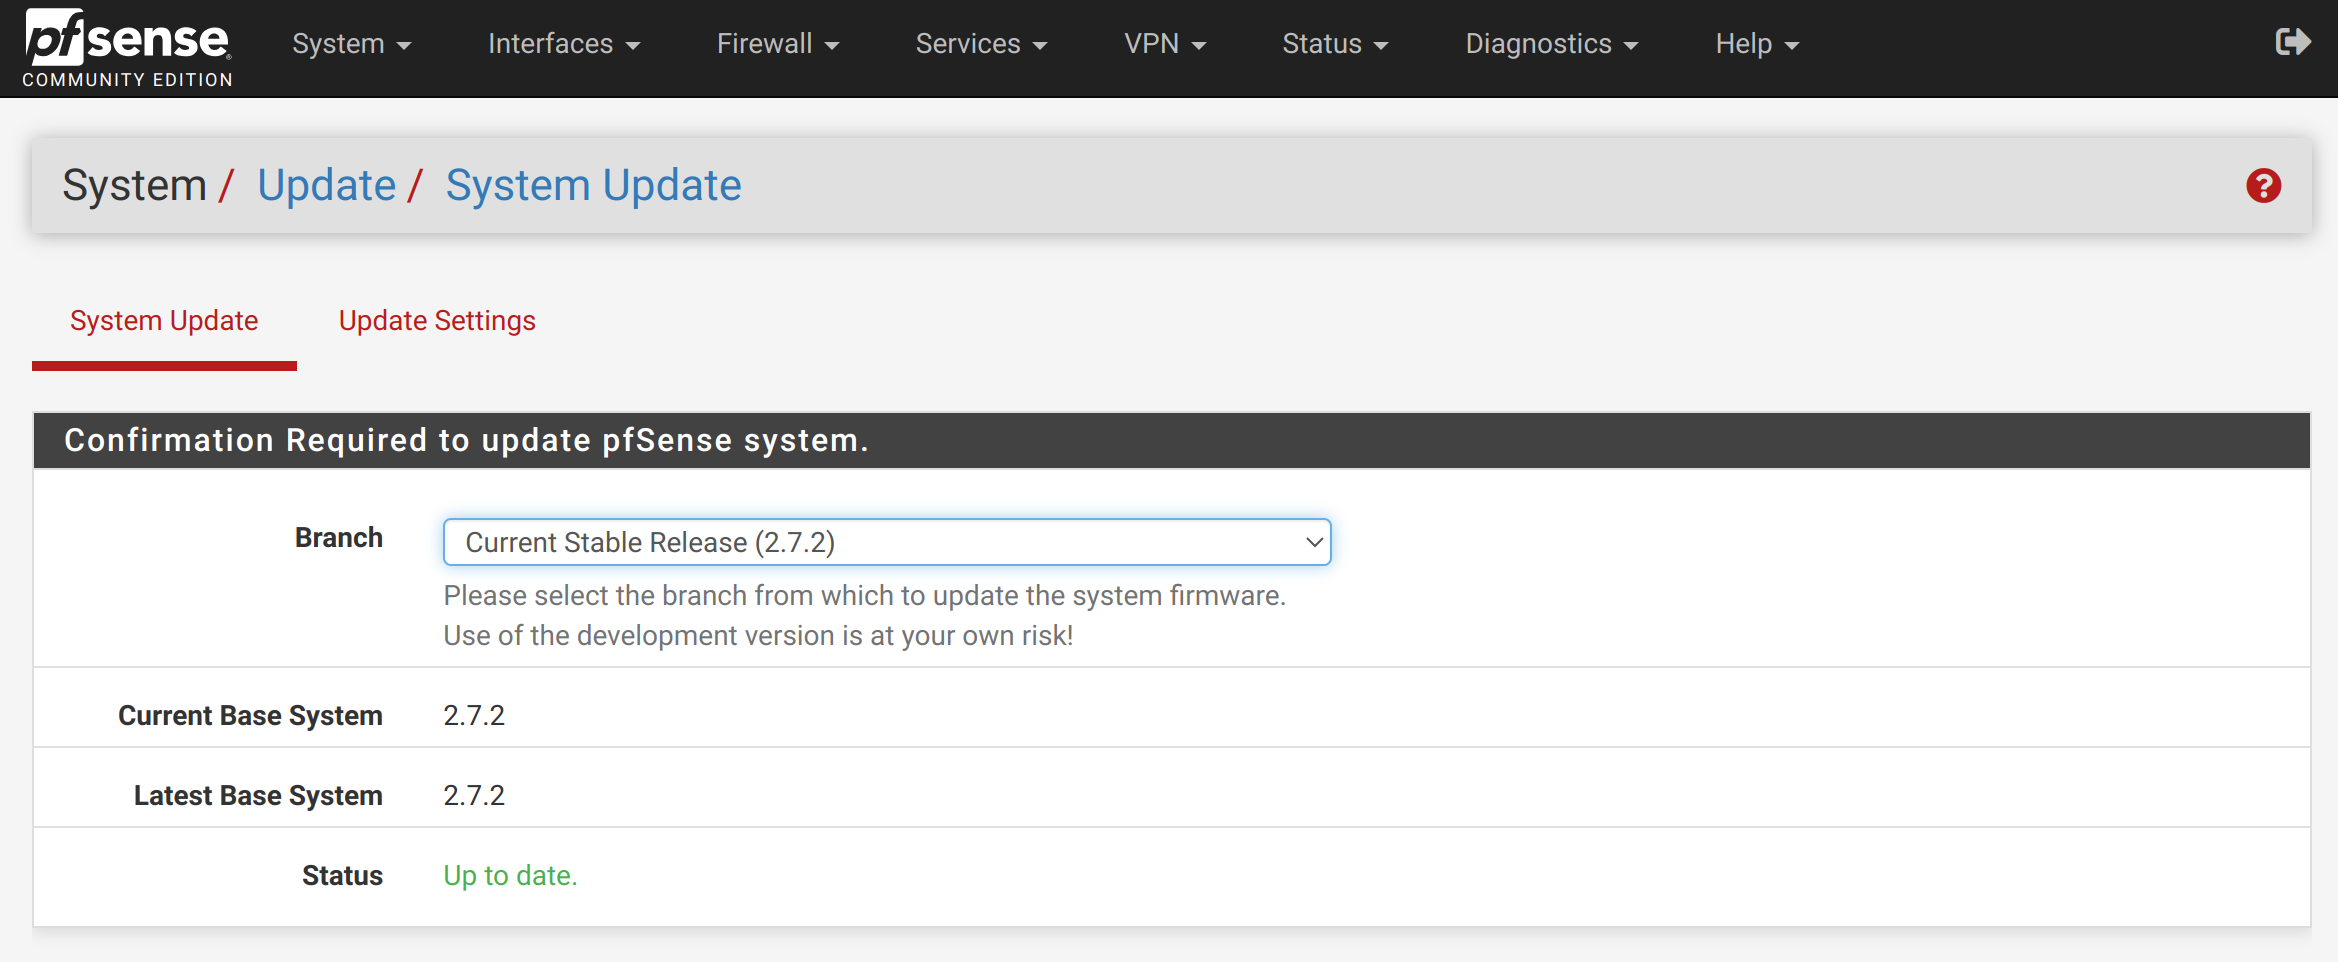
Make sure that your pfSense 2.7.x is on at least 2.7.2 base system prior to installing Netify. To check and make updates, login to pfSense's web interface
and navigate to System -> Update. If your system status is not showing 'Up to date', perform an upgrade.
Adding Netify Repository
mkdir -p /usr/local/etc/pkg/fingerprints/Netify/trusted
curl https://download.netify.ai/5/freebsd/fingerprint -o /usr/local/etc/pkg/fingerprints/Netify/trusted/fingerprint
cat << EOF >  /usr/local/etc/pkg/repos/Netify.conf
Netify: {
  fingerprints: "/usr/local/etc/pkg/fingerprints/Netify",
  url: "https://download.netify.ai/5/freebsd/14.0",
  signature_type: "fingerprints",
  mirror_type: "http",
  priority: 11,
  enabled: yes
}
EOF

pkg update
After executing this command, you should see:
Updating Netify repository catalogue...
Netify repository is up to date.
..
.
All repositories are up to date.
You can now install the agent with this command:
pkg install netifydCommand Line Installation
pkg add http://download.netify.ai/5/freebsd/14.0/amd64/netifyd-5.0.44.pkgPost Installation
After installing the agent, verify the installation and some path information using the -s (status) argument.
netifyd -s
Netify Agent/5.0.44-1-HEAD-nnnn-aaaaaaaa (debian; linux-gnu; x86_64; conntrack; netlink; dns-cache; tpv3; tcmalloc; regex)
✗ agent is not running: PID 0
• persistent state path: /etc/netifyd
• volatile state path: /var/run/netifyd
! agent run-time status could not be determined.Netify Informatics
 Netify Informatics is an optional, cloud-based, SaaS service. It uses analytics and Machine Learning to transform telemetry originating from the Netify DPI
Agent into high-level network intelligence and visibility. The solution provides insights into what's happening on the network in areas that include:
Netify Informatics is an optional, cloud-based, SaaS service. It uses analytics and Machine Learning to transform telemetry originating from the Netify DPI
Agent into high-level network intelligence and visibility. The solution provides insights into what's happening on the network in areas that include:
- Device Identification and Management
- Cybersecurity Risk
- Forensics
- Regulatory Compliance
To learn more about Netify Informatics, click here.
In addition to the Netify agent being installed, two plugins are required:
If you installed the agent by configuring a Netify software repository, simply run:pkg update
pkg install netify-proc-core netify-sink-http
Once the plugins have been installed, run the following two commands:
netifyd --enable-informatics
netifyd -pnetifyd command with the --enable-informatics option will result in a Provision code not
found error during the provisioning wizard.